Turck Web View
A .TWV file is used to create a virtual Human Machine Interface (vHMI) for Turck devices. vHMIs allow users to interact with and monitor devices through custom screens, layouts, and controls, all rendered in a browser or device web view.
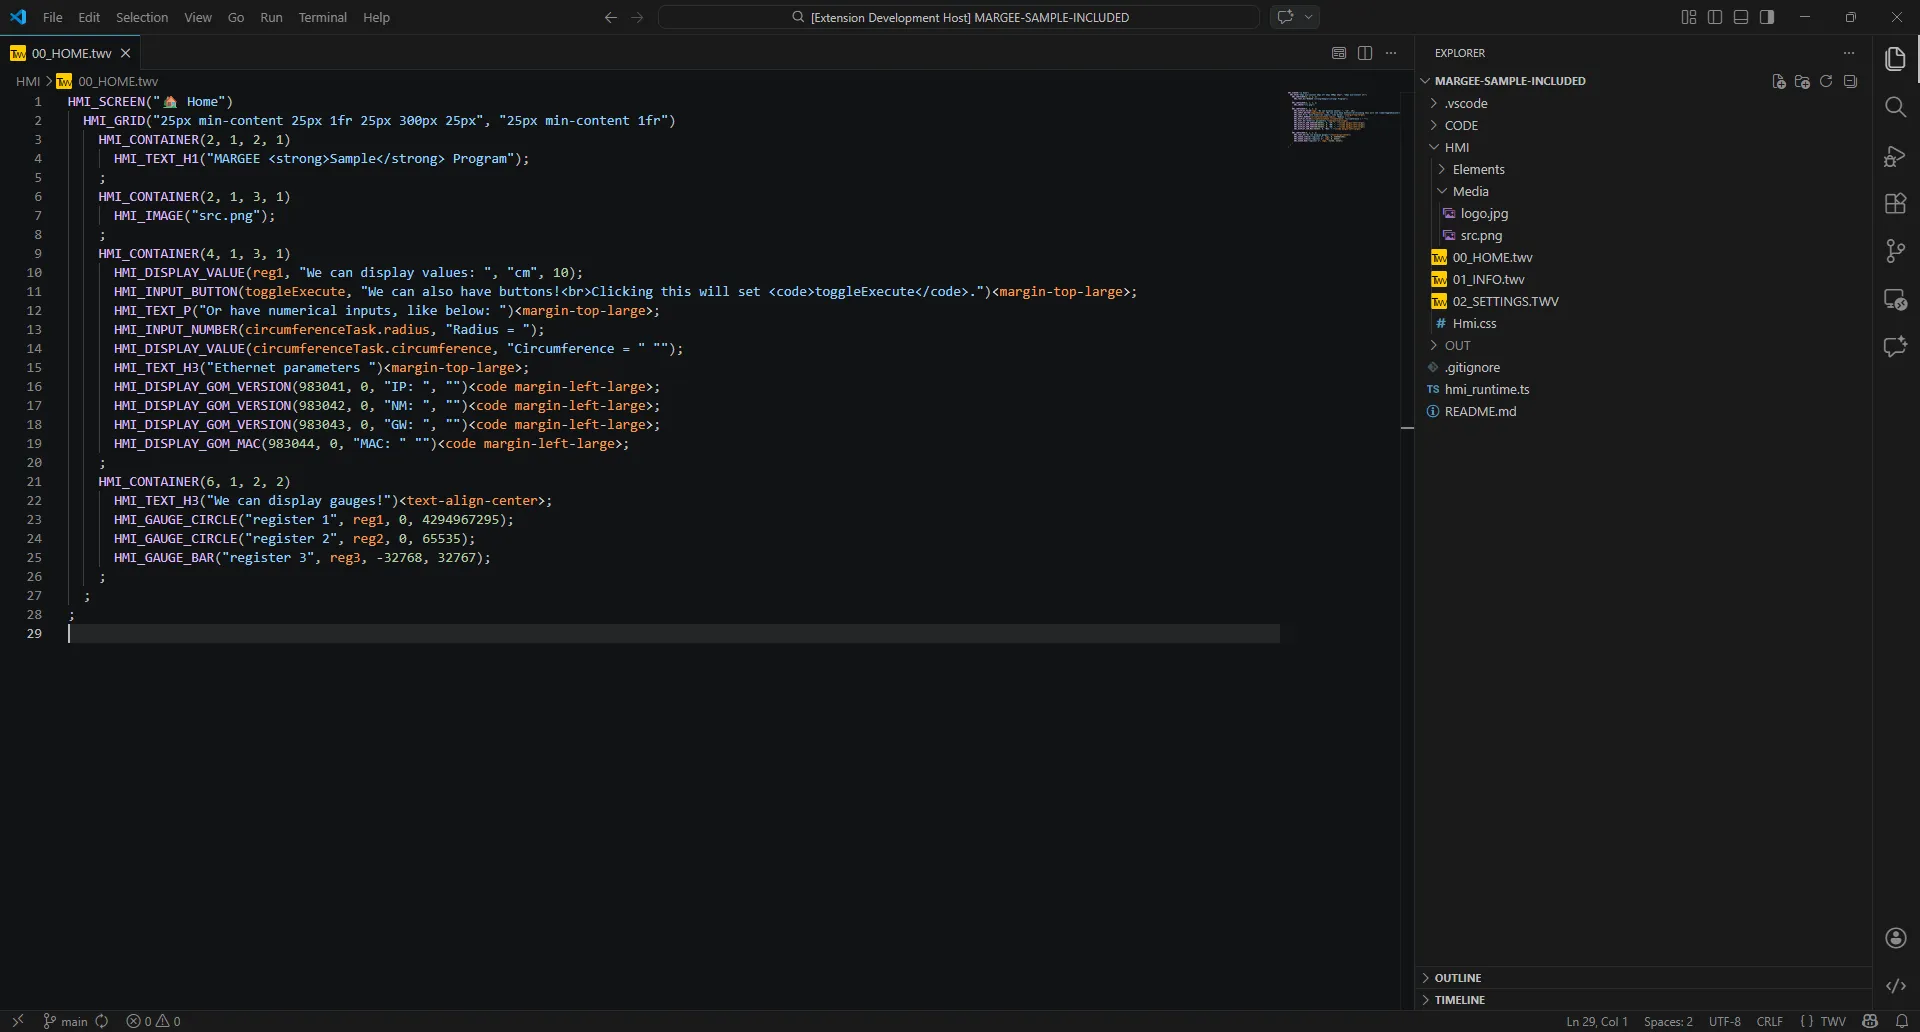
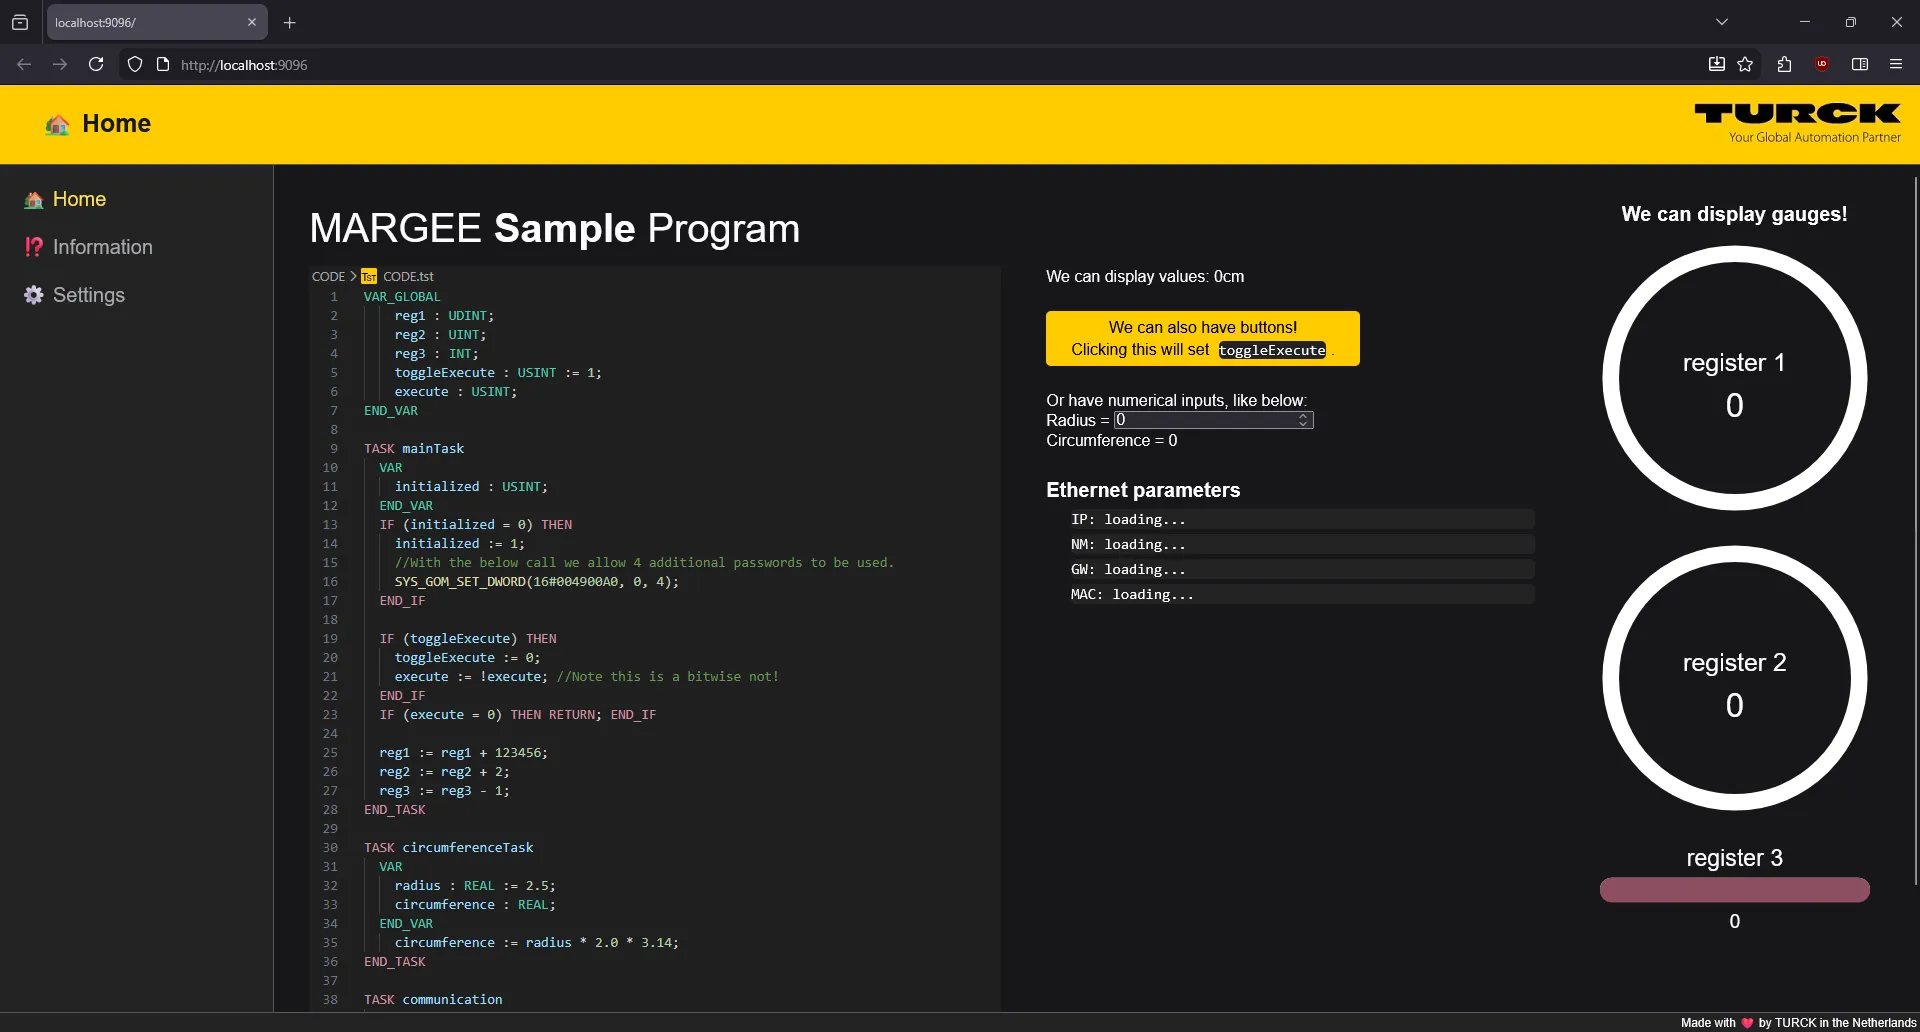
The above image can be viewed on the device (<device IP>/hmi.html) as:
A .TWV file defines the structure and layout of your HMI screen. You can use Cascading Style Sheets (CSS) for styling and JavaScript for dynamic behavior, giving you flexibility to build rich, interactive HMIs.
:::tip
Multiple pages are allowed by Margee. Each screen should be defined in a different .TWV file. Screens are displayed in the order they appear in the editor.
:::
- TWV: Declarative markup for layout and logic.
- CSS: Styles the rendered HMI.
- JavaScript: Powers the behavior of elements like
HMI_SCREEN,HMI_GRID,HMI_DISPLAY_VAL, etc.
TWV File Structure
Section titled “TWV File Structure”Every TWV file follows a similar tree structure:
HMI_SCREEN(<arguments>) <CONTAINER_ELEMENT>(<ARGUMENTS>) <ELEMENT>(<ARGUMENTS>); <ELEMENT>(<ARGUMENTS>); <ELEMENT>(<ARGUMENTS>); <CONTAINER_ELEMENT>(<ARGUMENTS>) <ELEMENT>(<ARGUMENTS>); ; ; <ELEMENT>(<ARGUMENTS>); <ELEMENT>(<ARGUMENTS>); <CONTAINER_ELEMENT>(<ARGUMENTS>) <ELEMENT>(<ARGUMENTS>); ;;- HMI_SCREEN: Main entry point for every screen. Handles layout, header, footer, navigation, and main content.
- CONTAINER_ELEMENT: A container element can be called anywhere, and must have child elements. All UI elements inside a container are rendered inside the container on the screen.
- ELEMENT: UI elements that render content on the screen
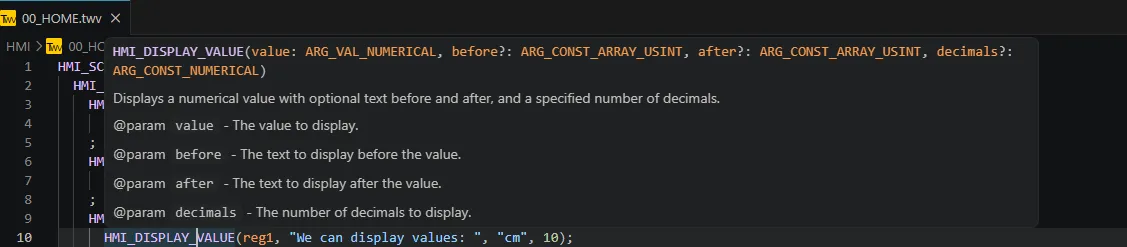
:::tip
A preview is available, allowing you to directly visualize any changes you make. Start it by clicking the command button on the top-right corner of any .TWV file.
:::
Design guide for MARGEE sample projects
Section titled “Design guide for MARGEE sample projects”The native implementation chosen is based on a GRID system, which allows for complex layouts. Each element takes arguments that define its position and size within the grid. The following seections will cover these elements.
Users are free to create their own custom elements and layouts as well. TWV elements are created in Typescript and can be extended and customized. The applied interfaces and how to use them are explained in typescript;
HMI_SCREEN
Section titled “HMI_SCREEN”The HMI_SCREEN element is mandatory for every screen. It manages the main layout, including header, footer, navigation, and the main content area where the grid is rendered.
Inside a screen element, one grid element must be declared.
HMI_GRID
Section titled “HMI_GRID”The HMI_GRID provides a grid-based layout system with rows and columns, allowing for complex layouts. You can set widths and heights for each row and column.
Example:
HMI_GRID("3fr 1fr 2fr", "2fr min-content 1fr"); //Args: column sizes, row sizes <your containers> END_HMI_GRIDThis translates to a layout like:
1
2
3
4
5
6
7
8
9
HMI_CONTAINER
Section titled “HMI_CONTAINER”Containers hold UI elements such as HMI_STATIC_TEXT, HMI_DISPLAY_VAL, HMI_GAUGE_CIRCLE, etc. Elements are ordered vertically unless styled otherwise in CSS or container implementation files.
:::tip You can nest grids inside containers for more advanced layouts. :::
Example:
HMI_GRID("3fr 1fr 2fr", "2fr min-content 1fr"); //Args: column sizes, row sizes HMI_CONTAINER(1, 2, 1, 1); //Args: column, column-span, row, row-span | YELLOW HMI_CONTAINER(2, 2, 2, 2); //Args: column, column-span, row, row-span | ORANGE END_HMI_GRIDThis translates to a layout like:
1
2
3
4
5
6
7
8
9
Best Practices
Section titled “Best Practices”- Use separate
.TWVfiles for each screen to keep layouts organized. - Leverage CSS for consistent styling across screens.
- Use JavaScript for dynamic and interactive elements.
- Preview changes frequently to ensure your HMI looks and behaves as expected.